ASNs - Creating, Managing, Editing and Deleting ASNs
Overview
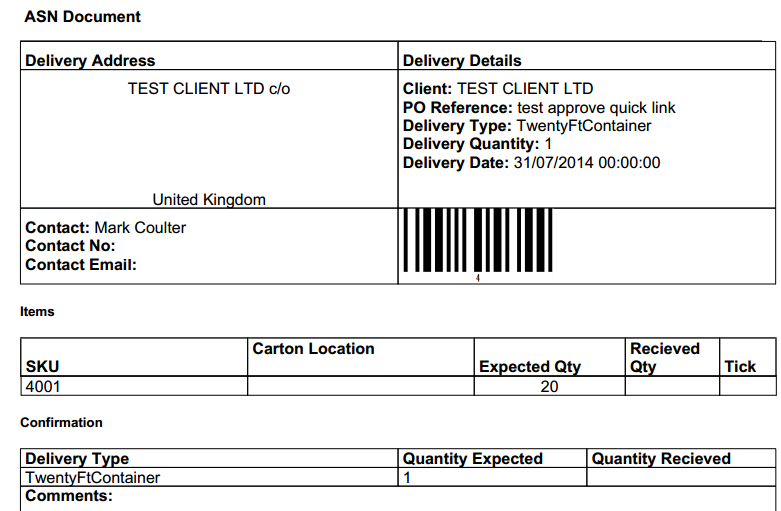
What is an ASN?
What information do I need to include in the ASN?
- Shipment contents, by SKU - those SKUs must also have all required information within them such as valid barcodes, weights, dimensions etc. Insufficient SKU information will prevent a successful ASN from processing, which may incur extra costs or delays
- Delivery Type - it is important to specify the Delivery Type as certain types (Pallets & Containers) will require approval from the warehouse to ensure that the delivery can be accommodated on the date stated. Also, selecting the incorrect Delivery Type could result in unnecessarily delays or additional charges, so it is important to ensure that the information provided, is correct
- PALLETS: Both our facilities can accept UK and EPAL pallets, with a maximum height of 1.5m. Pallets exceeding 1.6m and with considerable overhang will be stored in OVERSIZE pallets locations which incur premium storage fees. Shipments arriving on US pallets will need to be re-palletized on arrival onto UK or EPAL pallets at an additional cost. Max weight per pallet: 500kg (in line with warehouse racking safety rating)
- FCL/CONTAINERS: We can accept virtually all main sizes/types of shipping containers (20ft, 40ft, 50ft, HC etc.). For the fastest unloading and booking of stock, we advise FCL shipments to be pallet-loaded not floor-loaded. Please see our Goods In Gold Standard on guidance for getting the cheapest and fastest goods in service from GEE (please email 3pl@globalecommexperts.com should you require a copy of this)
- Quantity
- Destination Warehouse - we will need to know if this is going to the UK or NL warehouse
- Attachments - any supporting documentation, such as packing lists, bill-of-lading, haulier/courier paperwork etc. should be provided when the ASN is created
Requested Notice Periods for ASN Deliveries into our Warehouses
To help our Warehouse Team effectively manage incoming deliveries and ensure your ASN can be received without issue, we kindly ask that as much notice as possible is given—especially for larger shipments that require more planning. As a guideline, we recommend the following notice periods:
-
Containers: Minimum 7 working days’ notice
-
Pallets: 3–4 working days’ notice
-
Cartons: Ad-hoc, depending on volume
If you’re unable to provide the recommended notice on occasion, the Team will of course do their best to support you. However, please be aware that if the Goods-In Calendar is already full, we may not be in a position to accommodate late notice deliveries.
To help us plan effectively and avoid delays, please ensure your Customer Success Representative (CSR) is kept updated on all ASNs—especially if there are any changes to an agreed ETA. We will need to re-confirm receipt with the Team in such cases.
For any support or questions regarding ASN deliveries, please contact us at 3PL@expandly.com.
Creating an ASN
- Warehouse - please select the applicable warehouse from the drop-down
- PO Reference - this is the reference you would like to use for the delivery
- Supplier - select the Supplier from the drop-down or click
to create
- Supplier Notes - you can use this field to add supplier notes, if any
- Estimated Delivery - add the estimated date of the delivery. At this point, it is only an ETA, which can be modified by warehouse admin users, once the delivery is actually booked in
- Comments - you can use this field to add any comments. This can be used to add any and all additional information to the ASN that would help us meet your needs as best as possible ('Please book into ground location as stock will be used for B2C orders' or 'Stock is going straight to FBA, please prep accordingly', for example
- Delivery Type - from the drop-down, select the Delivery Type - carton, pallet or container
- Quantity - add the quantity of the Delivery Type expected. At this point, you can add an expected quantity, which can be amended by warehouse admin users at the point of book-in
Managing & Editing ASNs
Adding attachments to ASNs
Deleting ASNs
Need more help?
Related Articles
Creating Cross-Dock ASNs and Orders
Overview In this guide, we will explain what Cross-Dock is and how this works in a 3PL environment. We will also explain how you can create cross-dock ASNs and Orders in the OMS, should you wish to use this method for managing your inbound/outbound ...Managing Purchase Orders
Overview In this guide we will show you how to add, view and delete Purchase Orders (POs), in your account. Before you Start Before you start, we would recommend creating your Suppliers in your account. How to do this is explained in the below guide: ...Managing Bundles
Overview In this guide we will show you how to add, edit and delete bundles. Adding Bundles 1. Click Dashboard (left menu) > Products > Add New Bundle: 2. On the Add New Bundle page, fill in all required details and once done, click : Please Note: ...Managing Scheduled Reports
Overview In this guide, we will show you how to create Scheduled Reports on your account. Creating Scheduled Reports 1. Click Dashboard (left menu) > Reports > Scheduled Reports: 2. On the Add Scheduled Report page, define report criteria as required ...Managing Suppliers
Overview In this guide, we will show you how to add, view, edit and make suppliers inactive on your account. Please Note: Suppliers are only applicable when inputting Purchase Orders and ASNs. Adding a new Supplier 1. Click Dashboard (left menu) > ...